Check us out on social media!

Showing posts with label crafts. Show all posts

FREE July 4th Printable


Celebrating Independence Day? Don't forget to get this printable to show your patriotism! It is sized for 5x7 but can be resized, although it will lose some of its printing quality.

Click here to view & download Let Freedom Ring printable. (You will be taken to Google Drive.)
read more "FREE July 4th Printable"

2 FREE Easter Printables

Easter is coming up very soon, and if you're anything like me, you like to spruce up the home with cute Easter-y stuff. (I know "Easter-y" isn't a real word, but it works for me!)

So I created 2 different printables - one with a Christian theme and one that is religion-friendly. Both are 5x7 but can be resized to fit whatever your needs are.

HOPPY EASTER
free Easter printable
Click here to view & download the Hoppy Easter printable.

HE HAS RISEN
free Easter printable
Click here to view & download the He Has Risen printable.

Which one do you like best?

If you don't get to stop by before Sunday, Happy Easter!

read more "2 FREE Easter Printables"

3 Things What I Want To Try in 2016


I have already deemed this year as "my" year, branching out and trying new things. Last year, I really just stayed where I was. I tried cross-stitch, but I really couldn't get into it. I tried paint by number, but I didn't find any joy with that. The only thing I could do without any problems was read, but I've been reading my whole life.

So this year, I decided to kind of challenge myself, and find things I really want to try. I created a small list of hobbies that I think I could enjoy.

*This post may contain affiliate links.

1. Gardening
(credit)
I have always found gardening to be fun and exciting, but the only thing I have ever planted to lived long enough to make a statement was a willow tree sapling that died this last summer. It lived a whopping 6-7 years. But now that I've been researching a lot about gardening in Texas, I think I can get a flower to live long enough to show it's beautiful colors. Or at least I hope I can.

2. Crochet
Crocheting in the Round: Mix & Match Hats 
I've tried to crochet so many times, but my lines are messy and I can't seem to master the Magic Circle. Luckily, for me, Craftsy has tons of crochet classes! I really want to take their Crocheting in the Round class. Maybe I'll finally get that Magic Circle down.

3. Running Longer Distances
(credit)
In 2014, I started running. I wasn't running long distances at first, just going to the end of the block and coming back. Now I can usually run about a mile a day, if I feel up to it. As I've started to lose more weight, I would love to start running a bit longer, perhaps even running in in a 2K or 5K! I find this article to be very inspirational!


What are 3 things you would love to start doing this year?

read more "3 Things What I Want To Try in 2016"

Soda Bottle Mini Greenhouse Tutorial


It's springtime and that means that it's time to start planting those seeds! The only problem with early spring is that there is still the chance of one last cool front, and you're new seedlings are at mercy of the weather. A great way to protect those little plants (and keep them growing strong) is by starting your little indoor green house using nothing but plastic soda bottles!

What You'll Need

1 1-liter soda bottle (I used a Dr Pepper bottle.)
Scissors
Seeds
Water
Soil

What To Do
Make sure the bottles are clean!
1. Remove the caps. Cut both bottles in half.
2. Fill the bottom half of the 1-liter bottle with 1/2" of water.
3. Put the 1-liter spout top upside into into the 1-liter bottle bottom with the spout facing down towards the water.
You can't see it, but there is water on the bottom.

4. Fill with soil. It's okay if soil gets into the water. If you want to avoid that, you can put a small paper towel in the spout -- but make sure that water can still drain through the paper towel.
5. Place 2-3 seeds into the soil, following seed directions.
Seeds are in place and it's ready for labeling!

6. Lightly wet soil, but not soaking wet.
8. Set in a sunny warm place like a windowsill.

Chalk labels are a great way to label so you can reuse your greenhouse! By the way, it says Garlic Chives. I ran out of room. Haha!
Be sure to label your greenhouses with the seed name & the date you planted it! (Example: Chinese Lanterns 3/25)

Not sure how to keep your little plants growing? Be sure to water when the soil is dry. Don't over-water or under-water... this is a surefire way to kill them. (Trust me on this!) A goof-proof way to water your greenhouse plant is to use a spray bottle and spray the water onto the soil.

This is also a great way to get kids interested into plants and teach about how greenhouses work!

You can also go a step further and cut a 2-liter bottle in half, take the spout top and place it over your greenhouse.
read more "Soda Bottle Mini Greenhouse Tutorial"

#kanvaslabels chalk label ideas!

I was NOT compensated for this review. I received a free product to facilitate this review. All thoughts & opinions are my own. Your experience may differ.

We've seen chalk labels every where, but mostly on glass canisters, where you can clearly see what is inside.


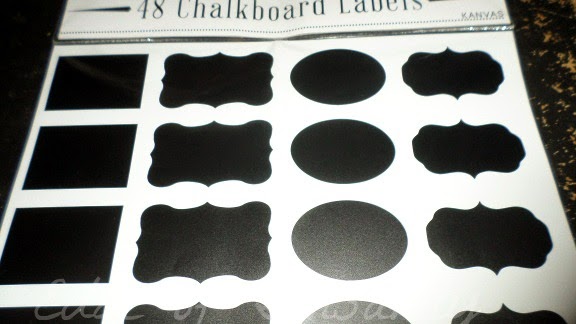
But did you know that Kanvas Labels chalk labels are one of the best brands, and can be used practically anywhere?  Hard to believe, I know! They are reusable, since you just use chalk to write what you need and erase when it's time to start again. They are water-proof for accidents, and provide endless possibilities.

We got the chance to try them out, and we came up with some pretty cool ideas! (Though we didn't do all of them, we just came up with some of these great ideas.)
  • Recycled canisters that aren't clear, but you need to know what's inside!
  • On planters, especially herbs/small plants.
  • DIY chalkboard calendars.
  • Labels for notebooks or storage bins.
  • Desk accessories, like the in/out trays.
  • Boxes you've hid for holiday gifts (like Mother's Day, Christmas, birthdays, etc.)
  • Personalizing family members' stuff.

#kanvaslabels

So what exactly did we use ours for? Seedling starting planters, mostly! Did the labels do the job? Absolutely! The smooth surface was easy to write on, and easy to erase. They come in packs of 48 (and 4 different styles) so we will never run out of ideas, especially since they can be reused. 

Organization isn't easy for some people (like me), but Kanvas Labels chalk labels can make it seem like it is! You can purchase them on Amazon for only $7.99 - a steal!

read more "#kanvaslabels chalk label ideas!"

Magazine Wreath Tutorial


The other day, I saw a magazine lying around and thought, "Instead of throwing it away, I wonder if I can find some sort of craft to use it for.". Believe it or not, I didn't go to Pinterest immediately. I actually googled something like "magazine catalog wreath" and that lead me to this beautiful Upcycled Magazine Wreath tutorial on Addicted2Decorating. But I didn't have everything she had, especially the 18" wreath form. So instead, I decided to do a mini-version and tweak a few things.

What You'll Need
Scissors
Tape (I couldn't find the scotch tape so I used the paper medical tape we always keep on hand.)
Glue (All I had was Tacky glue.)
2 magazines (You might need more/less, depending on how many colorful pages there are.)
7.6" x 7.6" piece of cardboard
2 circular things of different sizes (2" wide top from a canister and a 6.5" or 7" paper bowl will work just as well. The sizes must be different!)
Ribbon or fabric
Ruler
Pen/Sharpie (Pencils will not work, unless it is a charcoal pencil.)

Optional:
Exacto knife (This will help when cutting the cardboard. We don't have one.)

TOTAL PRICE: FREE!

Ready to get down to work?

1. Gather everything you will need. It is tedious so you want to make sure you have everything within reach.
Step 2. Measure twice, cut once... 

2. Take your 7.6" x 7.6" cardboard and place your smaller circle that's at least 2" in diameter in the middle. Trace and cut it out. An Exacto knife would work perfectly in this case. I didn't have one so I had to use scissors. Can I just say that cutting a circle in the middle of cardboard with scissors stinks? It does.
Step 3. This is what you should end up with, minus my sloppy scissor-work.

3. Now place your paper bowl that's at least 6.5" or 7" in diameter right over the smaller circle and trace. It's okay if you can't trace it around completely. You can cut to make your wreath form look more like a circle. Toss both cutouts away. You won't need them! Don't forget to poke a small hole at the top of the cardboard circle to thread thin ribbon or fabric as a hanger!
 Step 4. Look at all the pretty colors!

4. Take your magazines and look through them. If you find a colorful page you like, cut or tear it out. (If you tear it out, you can always cut the side to make it more even.)

5. Gather as many as the pages you think you can cut with your scissors and stack them. You may need to use the ruler to measure and mark, but with the papers stacked together, cut 2.5" x 2.5" squares. I tried to cut individual squares and almost went mad! You will probably need 100 or more.

Step 6. Roll, roll, roll your squares!

6. Taking one square in your hand, roll it around your finger (or anything like a nail polish bottle top, AA battery, or something similar), going from point to point (not corner to corner). You want it to look like a pointy cylinder. Secure the end with tape (or glue). Next, fold in half shortways. You can either have the pointed open ends facing away or to each other. Your choice. Secure the middle with a little tape or glue. You might want to pace yourself with Step 6. It gets really tedious after rolling 15 of those squares.

 Step 7. Glue until you think you'll dream of gluing in your sleep.

7. Run a strip of glue around the rim of the inner circle. Place the folded end of your rolled square on the glue and hold for a few seconds until it sticks. Keeping place the folded edges on the glue until either A: you run out of space or B: you run out of rolled papers - in which you would have to make more, unless you run out of patience and quit.

8. Once you have done the inside, it is time to start moving to the outside. Now, the squares we have already glued will be getting in the way to run a strip of glue around the cardboard so you will need to start gluing the papers individually. You don't have to finish this in one sitting. I sure didn't! Remember- start on the inside and work your way out. Just be sure you don't completely cover the hole for your ribbon/fabric!
Step 10. After 3 days, this is what the finished product looked like!

9. Once you have glued everything, including your sanity, to the cardboard, thread your ribbon or fabric through the hole and hang. Voila - you added instant home decor for free and helped the environment! (Sorta.)


read more "Magazine Wreath Tutorial"

4 Fun Snowflake Crafts for Kids!


It's almost wintertime! Though, I am sure it sure feels like winter in a lot of places. It is also the time to start making those awesome-looking snowflake crafts! This is great for places that either get a ton of snow (and love it), or those that don't get any snow (and want to create their own).

These are geared towards children (though some adult supervision may be required) but I think adults will have fun with them as well.

1. Frosted Pipe Cleaner Snowflakes from By Stephanie Lynn.
2. Toilet Paper Roll Snowflakes from Muffin Top Mom.
3. Glitter Snowflakes from First Palette. (By the way, we did something similar like this one year and they were gorgeous!)
4. Macaroni Snowflakes from Katy Elliot.

We don't get much snow in my part of Texas so to create a winter wonderland, we always try to do some sort of snowflakes. Last year, we did Star Wars snowflakes! I wonder if there are Doctor Who snowflake templates around.

read more "4 Fun Snowflake Crafts for Kids!"

5 Pumpkin Crafts that's fun for everyone!


This year, it is all about pumpkins! So I came up with 5 pumpkins crafts that are not only family-friendly (even with older children), some are kid friendly for little fingers! 

1. Pumpkin Duct Tape Treat Bag from Confessions of an Overworked Mom
2. Pumpkin Suncatchers from Here Comes The Girls
3. 5 Little Pumpkins from All Kids Network
4. Pumpkin Jars by Making of a Mom
5. Easy Hanging Jack-o-Lantern by The Polohouse

Which one is your favorite? I love the little jars and they look so versatile!

read more "5 Pumpkin Crafts that's fun for everyone!"

St. Patrick's Day Subway Art Printable (FREE)

St. Patrick's Day is just around the corner and since I'm Irish, I always get excited about it! I am very proud of my Irish heritage (as well as my German heritage), so I always try to find ways to show it.

I decided to create my own St. Patrick's Day subway art printable that I plan to print and put into a picture frame. I might even hang the Lucky Pennant Banner next to it. You are welcome to use it as well, and it is free to download here. Of course, you could always just click on the picture, save it, and print it that way.

I will have an Easter printable available when it gets closer to the holiday.

Slainte mhaith! (Translated literally, it means "good health" but it is generally used to mean "cheers" in Ireland.)
read more "St. Patrick's Day Subway Art Printable (FREE)"

Lucky Pennant Banner Tutorial


I know St. Patrick's Day isn't for a month, but I saw something on Pinterest for a Luck Pennant Banner made from paint chips/cards and the Irish in me wanted to make it immediately! So when Dad went to Walmart, I had him pick up a variety of various greens. Unfortunately, they didn't have much of a selection so some of the "white" pennants and letters/shamrocks are actually lime green. It's just hard to get that kind of green to come up in light.

Anyways, I decided to share with you how to make this Lucky Pennant Banner!

What you'll need:
10-15 paint chips/cards of various greens (You can get them for free at many stores. Just ask beforehand.)
Pencil with an eraser
Clear tape or glue (We used tape. I couldn't find the tacky glue. Oops!)
Scissors
String or ribbon (We used fishing wire, since that was all we had at the moment)
Shamrock template (I cut one from a catalog.) You may need to resize them so they can fit on your pennants.

1. First, assemble all of your supplies. Then figure out how you want it to look before you start tracing and cutting.. You can do dark green, light green, dark green, light green, etc. Or you can do it the other way around.


2. Using your pencil, draw a pennant shape on one of the paint chip/cards. Start from one corner, and draw a straight line to the bottom of the other side. Use the picture below as an example.

3. Continue drawing pennants on 10 of the paint chips/cards. Once you're done, cut out the pennants and set them aside.
All 10 pennants
4. Using the other 5 paint chips/cards, write or draw "L", "U", "C", "K", "Y" in block letters. Be sure to save some room for your shamrocks! Cut out your letters.
"L" is for the luck of the Irish! :)
5. Now trace your tiny shamrocks and carefully cut those outs. We decided on 6 shamrocks. Our poor fingers!
Tiny little shamrock!
6. Once you have cut out everything, be sure to erase any pencil marks on your cut items. You don't have to, but it will look better.

7. Tape (or glue) the "L" to the first pennant of your choice, then tape/glue a tiny shamrock to the next pennant, and so on until you have a letter/shamrock thing going on. Depending on how many shamrocks you are willing to cut, we used 2 shamrocks on the last pennant (after the "Y").
Put the shamrock pennants between the letters, creating a spacer.
8. Arrange the pennants how you want the banner to look. Don't put away the tape yet! Flip each pennant over and loop the tape over your finger and place the tape about 1/2" away from the top of the pennant. This will allow whatever string or ribbon you have to pass through the tape loop. 

9. Starting with your last pennant, string whatever string or ribbon you have chosen from right to left. Otherwise, it might read backwards. Unless you know what "YKCUL" means, start stringing from right to left. If any pennants sit crooked, just re-position the tape until the pennant sits straight.

10. Hang and enjoy!


Now, hopefully your green colors are not as varied as our was. I promise you, there is NO white in this banner. They are all green, just some are lime green and some resemble pea soup.

We might have another paint chip craft in the works, but this time, it will make Easter a little brighter.

By the way, do you celebrate St. Patrick's Day?


read more "Lucky Pennant Banner Tutorial"

6 Fun St. Patrick's Day Crafts!


I know I have said before I am Irish, but as we get closer to St. Patrick's Day (March 14th), I can't help but want to make the house look a leprechaun lives here. So I decided to go on Pinterest and search through my St. Patrick's Day board for six fun and easy crafts! Believe it or not, one of the crafts was inspiration for a craft Twin and I did before Valentine's Day. It was so fun! (And yes, I promise to post it soon!)

Green Pepper Shamrock Stamps via Kids Activities Blog

Puffy Paint Shamrock via Sassy Dealz

Lucky Fingerprint Clovers via My Kids Guide

Luck Paint Chip Banner via Super Coupon Lady

Rainbow Hats via Coupons Are Great

St. Patrick's Day Gift Tags via A Little Claireification


Do you celebrate St. Patrick's Day? We sure do!


read more "6 Fun St. Patrick's Day Crafts!"

Star Wars Snowflakes

Scout Trooper
Since we have Star Wars fans in the family (Twin & Dad), it seemed fitting to cut out some Star Wars snowflakes. Templates can be found here.

We don't own an Exacto knife yet, so we all had to choose a template that was easy to cut with cross-stitch scissors and regular scissors. I chose Scout Trooper (which Twin informed me was different from a Storm Trooper), Mom chose Imperial Royal Guard, and Twin had originally chosen the Ewok.
Imperial Royal Guard by Mom
Mom finished her Imperial Royal Guard first, and I had finished my Scout Trooper next (minus a few lines I had missed on his helmet). Twin tried to cut the Ewok but without an Exacto knife, ears were cut in half and the little pieces seemed impossible. So she pretty much trashed that and printed out Darth Vader. It came out much better!
Twin's Darth Vader
If you are wanting to attempt this yourself, I suggest cutting it as you watch the tutorial video. It will definitely save a lot of time and confusion. We aren't completely sure if we want to hang them on the tree or in a window. What do you think?

read more "Star Wars Snowflakes"

3 Kid-friendly Thanksgiving Crafts!


Can you believe there are only 25 days left until Thanksgiving? Me neither! To get your little ones in the spirit of Turkey Day, I came across 3 kid-friendly crafts they can make for the special day!

Turkey Vase Centerpiece via Crazy About My BayBah

Paper Fan Turkey via A Girl and a Glue Gun

Thankful Turkey Box via I {Heart} Crafty Things


I know some families don't celebrate Thanksgiving. Does your family celebrate Thanksgiving? If so, what is your favorite thing about Thanksgiving?


read more "3 Kid-friendly Thanksgiving Crafts!"

Pumpkin Pail Topiary Tutorial


About 2 weeks ago, Twin was looking in some Halloween forums for a craft/DIY we could do for cheap when she came across a picture of a pumpkin pail tower made to look like a pirate. So I tracked down the website and found the original tutorial on Distress to Impress. But we're not major pirate fans here in the house so we thought a Witch pumpkin tower would look great!


Here is what you'll need:

  • (4) orange plastic pumpkin pails ($1 each at Walmart)
  • (2) Creepy Cloth bundles ($1 each at Dollar Tree)
  • 1 children's witch hat ($1.97 at Walmart)
  • Glue (We used Tacky Glue since we already had it. Though I am sure that a hot glue gun or Gorilla Glue will work just as well.)
  • Scissors
Total (if you have the glue): $8


Here is what you need to do:
  1. Cut the plastic handles off all of the pails. Discard the handles or keep them for a future craft project.
  2. Put one of the pails on the floor in the position you want it. Take your choice of glue, and put in on the bottom of another pail. Place the pail you just glued on the top of the bottom pail. Let the glue dry before moving on. Side note: If you are using a hot glue gun, you won't have to wait as long for the glue to dry. If you're using Gorilla Glue, you might have to wait longer.
  3. Put glue on the bottom of the 3rd pumpkin pail and place it on the 2nd pumpkin. Let the glue dry. Put glue on the bottom of the final pumpkin and place it on the 3rd pumpkin. 
  4. Glue the witch hat to the top pumpkin. The cut the Creepy Cloth into strips. Wrap the Creepy Cloth around the pail seams and tie a knot. Spookify until you're content!
You can use any extra Creepy Cloth to use around your home at Halloween, for a shawl for your witch, or what we eventually ended up doing, using it as a veil for our witch. Once all the glue is dry, you have yourself a neat plastic pumpkin pail tower! 

We're thinking of making another one, but we're not sure what character this one should be. Any ideas? Oh, and by the way, there are NO lights in the pumpkins. That is the evening sun filtering through them. Pretty neat, huh?


read more "Pumpkin Pail Topiary Tutorial"